Toilet Flooring with Tile Spacers
INTRODUCTION
It was observed from our many of the project sites that the flooring tiles used in toilets are of joint free type. It was reported by from the handed over flats of deferent projects that toilet floor has the major problem of leakage.
While going through the issue it was found that the joint free tiles that we are using in the floor are the reason for the leakage. Since the joint between the tiles are too small, it difficult to seal the joint completely, this leads to the penetration of water through the joint and resulting in leakage. Also these joints does not account for the expansion and contraction due to temperature by tiles, it will result in the failure of tiles.
Hence as a corrective action for this issue we suggest for the usage of the Tile spacers during the tile lying in toilet floors.
Why use tile spacers?
• Since the joints are sealed properly by joint filers, the problem of leakage can be prevented up to a greater extent.
• Since the joints are considerably large the replacement of tiles as individual is possible, thereby reducing the maintenance cost.
• The defect if any occurs in tiles then it can be easily visible due to these large joints.
• Tile spacers can aid in giving the tiling work a professional finish as well as providing a variety of style/design option and come in a range of shapes and sizes.
• Tile spacers allows to achieve a consistent pattern when fixing wall/floor tiles and help to ensure that all tiles are laid equidistant from each other providing a symmetrical finish in order for the grout to then be applied.
What size tile spacers should use?
Taking British Standards into consideration (as well as common practice) it is recommended that wall spacers are 2-3mm (with 2mm covering the majority of requirements) and floor spacers 3-5mm.
However a spacer of 3 mm is suggested for our climatic conditions.

Popular tile spacer sizes
How to use tile spacers: pre-testing
Use spacers to do a trial run for the desired design (this will help to finalize the design and ensure that they have a clearer picture of what the outcome will look like). It is recommended that to lay this trial run in the centre of the room and then visualise the complete design from different points in the room. It would also be wise to take into account any unusual areas that will need to tile (such as around sinks or showers) and see how they will affect the overall design.
How to use tile spacers: starting work
1. Locate the centre of the room (both length-wise and width-wise) and use a chalk line or laser level to create a gridline. This will ensure the first tile and spacers are aligned in a straight line and in the centre.
2. Lay the first tile in-line with the reference point (either the chalk line or laser level).
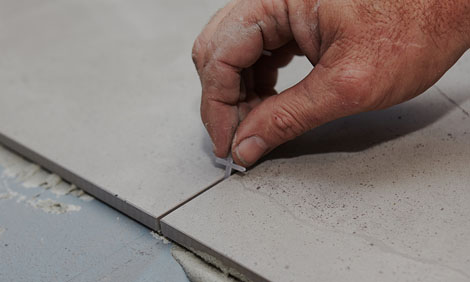
3. After the first tile is laid, put a spacer on each corner of the tile (ensuring they are flush).
Note: When using floor tiles it is also recommended to use two “square” spacers per side (in addition to the plus spacers on each corner). This provides additional accuracy along the length of the tile. It can turn a “plus” shaped spacer on its side to create a “square” spacer.

Placing the spacer between the flooring tiles
4. Place the next tile against the spacers of the first tile. Then place additional spacers against the remaining corners of the new tile.
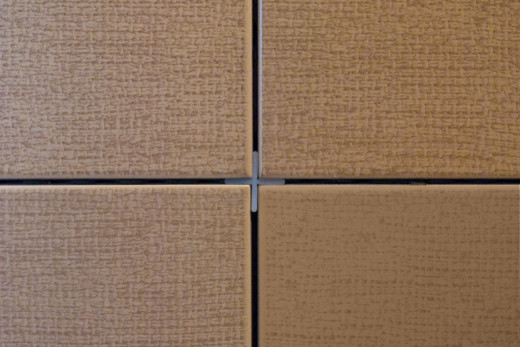
5. Repeat this process, expanding the wall/floor outwards using the spacers at the edges of each tile to keep a consistent distance between tiles.

Spacer maintaining a constant space between tiles
6. When it comes to an area where it do not need a four sided “plus sign” spacer use a T-shaped spacer. Place the “T-shaped spacer” with the flat end against the wall or other surface. Alternatively, you can break one “leg” off a normal “plus” spacer to make a “T” spacer.
7. Remove the spacers (using either by fingers or needle/snipe nosed pliers) after the tiles have been placed but before the adhesive fully seals. This time varies however it is usually 20-30 minutes (check the manufacturer’s information on the product packaging for accurate drying times).
8. Then can begin the grouting process, which closes the space between the tiles, bonding them together tightly and providing a waterproof seal.

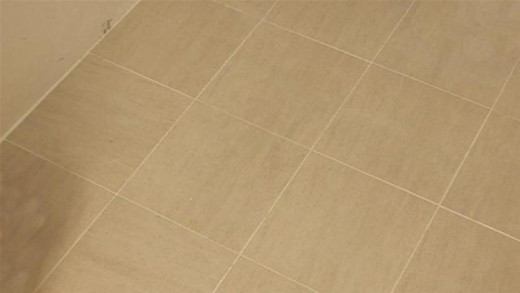
The finished floor will give a better appearance
2. CONCLUSION
1. It is not recommended for the size of the spacer used to go below 2mm for wall tiles and 3mm for floor tiles due to the requirement of stress relief. All walls and floors are subject to movement (due to climate condition changes etc) and without an element of stress relief tiles will either crack or buckle.
2. It can be finalized to use the spacers with size 2 mm in our sites for convenience and aesthetics appearance of toilet floor tiles.
3. It should be taken care to fill the joints using joint filler, which matches with the tile colour within the next day of tile lying.

No comments: